Saturday 10 October 2015

3D rotation: Day 4

On the morning of day 4 we were given until 1:30 to build a structure out of twenty spaghetti pieces that would be strong enough to hold three plastic balls off the surface of the table.


 After designing a few possibilities, I settled for this one which remained in keeping with my theme of triangles from earlier on in the week. I first created a simple square base with two spaghetti pieces stuck together with a gun to make up each side making it extra strong. I then crossed two spaghetti pieces over at different point of opposite sides of the square.
In doing this I used the straight and angular characteristics of this material to create an interesting looking structure.
My inspiration ultimately came from a dish drying rack or a book stand.
I also used the glue to create an interesting webbed aesthetic, to look as if something were drooping off the spaghetti pieces.

Although there were some frustrating aspects of this challenge such as waiting long periods for the glue to dry and the structure so very brittle that sections would detach quite easily, I really enjoyed this challenge as it was very satisfying to create a free standing structure out of such challenging material.
 I also used other objects such as mini plastic figures and a pencil to place on the structure and balls in order to put it into a new context.


In the afternoon we had a full group crit where everyone put their creations on display. It was very interesting to see the different solutions people had come up with for this challenge as although some where similar, people had approached the task in many different ways; some structures were clearly planned whereas others were very random but none the less worked really well.


Using five sheets of paper, we were then given an hour to protect our 3D structure from a downward force.
The way I had built my structure made it very difficult to think of ways that I could manipulate the paper to protect it.
I experimented with different techniques such as buffering to protect it but due to time constraints, my attempt was pretty hopeless in the end.


We then placed all our "protected" structures down in the corridor and the success of our solutions were put to the test as a basket ball was subsequently dropped on top of them. Most creations did not survive however a few did. Overall I felt that this was a very enjoyable activity as everyone was excited to see which creations would survive.


3D rotation: Day 3- Coding workshop

Research on real life examples of coding and programming

One example of this that I found particularly interesting was the app "Uber". This app works in collaboration with cab drivers. The location of these taxi drivers are sent constantly to a server so that when the user puts their location into the app they can see the whereabouts of the closest driver. The user can set a pick up location and the request and location of the user is sent to the driver. If the driver refuses then the server searches for the next closest driver to pick up the customer.
I thought that this was a very useful and convenient example programming.

Programming and coding can also have uses in creating artwork. The "Rain room" was an installation set up in the Barbican museum in London in October 2012 by Random international. 


The room was inhabited by a carefully choreographed downpour that responds to human movement and presence. As one walked into the room two cameras, one at the front and one at the side, captured the movement of the visitor through the use of one bright light that was directed into the rain room. Each image captured from both cameras was constantly analysed to let the computer know where the person was in the room. The information from both the cameras would then be combined to create coordinates of the walker and the computer would switch of the valves that control the water release where the coordinates and therefore the person was.

Programming

Also in the morning of day 3 the group took part in activities that would help us to understand what it takes to programme a computer to do something.
We were asked to write down each movement it would take to programme a "robot" to stand up from an initial lying down position on the floor. Using our selves and each other as robots, we were taught the importance of the "user experience", which basically included doing the activity our selves to realise the detail of the instructions that we would have to programme into the "robot".

Bellow are the final instructions that I came up with:

  1. Bend elbows and put hands beside waist.
  2. Use stomach muscles and neck muscles to lift head and shoulders.
  3. Bend right knee to a right angle using thigh muscle.
  4. Bend left knee to a right angle using thigh muscle.
  5. Transfer weight onto feet by pushing hands on floor and finish in squat position.
  6. Push feet into floor and straighten legs to stand up.

To develop our understanding of programming we were next asked to write down instructions for a friend to get from our house to the room we were sitting in at Ravensbourne.


These were quite tedious activities but insightful ones at the same time as we realised the importance of detail within programming. It was quite amusing when we had to read out what we had written and realised that some people had missed out crucial information when writing down instructions such as opening the door to the house and waiting for the traffic lights to change so that it was safe to cross the road.

Coding

In the afternoon we were introduce to coding. We learnt how to put code into the "terminal" programme to make the computer search for a curtain amount of images from google based on the words that we typed in. For example I typed in "10 pink+cat", which initiated the computer to place 10 pictures of pink cats from google images into a folder entitled "fetch".

Here is the process in pictures:


We then learnt how to recall our pictures from files within the folder "fetch".


We were then informed that a webpage had been created with the images we had told our computer to search for.


I have never done anything like this before so at first all the collections of different letters and symbols scared me because it looked so confusing. However after a while I started to see patterns within the code and begun to understand what had to be typed in and in what order to programme the computer to retrieve what I wanted it to. Having said that I don't really think that I will becoming a master of code anytime soon...

Friday 9 October 2015

3D rotation: Day 2

In the morning of day two we were given some time to research bridges and different types of spanning and stilted structures that would aid our bridge building activity in the afternoon. It was also recommended that we go outside Ravensbourne and draw on the surrounding structures and sculptures for inspiration.


As part of my research, I found this picture of the Ice-Skating Tent at the Olympic Park in Munich (1983).


Immediately I thought this structure looked very much like the O2 centre next to Ravensbourne as it too is a tent-like structure and has a walkway over it which looks like the metal supporting structure on this building.
The sheltered walkway leading up to the O2 and Ravensbourne could also be classed as a "spanning structure" and seemed to mirror the O2's spiked pillar aesthetic.


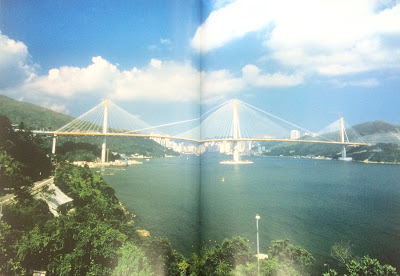
Another structure I liked was the Footbridge over Gahlensche Strasse in Bochum as this also seemed to echo the same type of designs seen in the pictures above. I particularly found it interesting how the walkway was supported by wires coming down from the main spiked pillars as they almost looked like two sails on a ship.


I particularly liked the spiralled structure of the Kilesberg Tower in Stuttgart and how the webbed affect on the outside not only acts as a safety precaution but also gives the structure an interesting aesthetic.


Bellow are some more images of creative bridges.


Bellow are some pictures of other structures which caught my attention around Ravensbourne.


For the bridge building we were split into groups of 7 or 8 and combined ideas from the research we did earlier to make our structure. We were only allowed to use Cardboard, rubber bands, bamboo sticks and tape, and what made it even harder was that the structure could only touch the floor in two spots and it had to be tall enough so that a boat (a folded up table) could pass underneath it. 

When my group started building we didn't have a fixed plan but developed the final idea as we were building. I think that we worked well as a team as each of us were doing something to help with the progression of the build. I felt that we automatically split off into two groups, with one half making the foundations for the bridge (the structures that would support it) and the other half making the road and other features above that would help the bridge to be stable and not collapse.


Our final design consisted of two foundation structures built out of bamboo sticks taped together in a pyramid-like way, an idea that was again based on the principle that triangles are the strongest structures. In addition the road was made by many pieces of cardboard taped together. The best part of the bridge however was the elastic band feature which helped to keep the road strong enough to support the car through tension. This same design feature can also be seen in a couple of the pictures I picked whilst researching and I really liked the outcome of this as I thought it also added decoration to the bridge.


Each of the group's bridges were put to the ultimate test at the end of the day when a remote controlled car had to be able to drive across them in both directions. Overall I found this activity really enjoyable as it was interesting to find different ways to hold up the structure and it was exciting to see which bridges worked.


3D rotation: Day 1

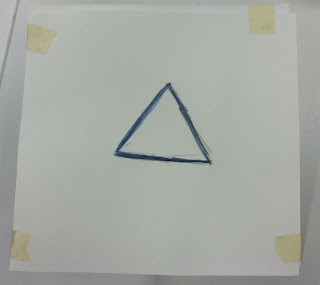
For the first day on the 3D rotation we were instructed to build a 3D structure out of paper that would support a filled water bottle at least two centimetres off the surface of the table. Being told many times the triangles as the strongest structures, I though I would try this idea out and make a pyramid like structure with a flat top so that the bottle could sit comfortably on it without falling.


Being a bit rushed for time at the end I randomly cut two squares of paper out and stuck them together for the flat top of the pyramid.
Going to test it, I realised that the design would have looked a bit nicer and neater if I had cut the excess paper off the flat top, maybe in a triangle shape to be in keeping with the design and decoration of the structure.
To experiment with this, after I tested it I then cut the flat top and took a picture to see what it would have looked like.


Although the paper structure is slightly crumpled from trying to stand the water bottle in it when it was turned upside-down, I think this picture captures what my developed idea would have looked like.

Despite having doubts about the design, I feel that the excess paper did add value to the pictures we were asked to take before the actual test, experimenting with lighting and putting the structures into different contexts. By placing the mini plastic figures on the extra paper on the top level, the structure seeming to turn into a model of a real life building. Thus a sense of vertigo is created as the viewer sees that the miniature figure seems to be standing on a suspended level very high off the ground.


This made me think of the Grand Canyon Skywalk in Arizona which is a transparent horseshoe-shaped cantilever bridge and tourist attraction near the Colorado River. After making the paper model and putting it in its new context using the mini figures I felt that I had unconsciously replicated the same idea of a raised extended platform seen in this structure.


In the afternoon we were asked to create another 3D structure out of cardboard that would support the full weight of a human being. For this challenge I used my improved version of the previous paper structure and it seemed to be very stable when I pushed down on it, however, when it was stood on, it collapsed.


Fashion and textiles rotation: Day 4

Before the final day we were asked to produce a variety of sketches that documented our ideas and development of the final wearable paper garment.

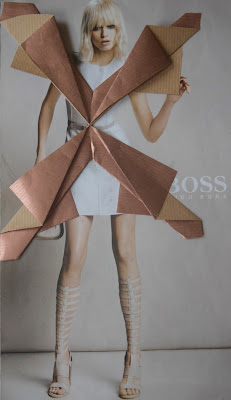
Focusing on my idea of the folded paper in an origami-like style from day 3, I created a series of sketches that included this particular idea for the top half of the garment. I also experimented with the idea of pleating on both the top and the bottom half of the garment.


For the final design I chose to create the sketch in the top right hand corner of the picture above, however this did not go completely to plan when making the final outcome. 


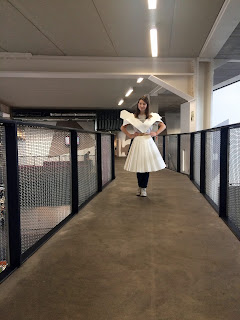
For the process of making it, I first completed the pleating for the skirt by joining many pieces of paper together using clear tape. I then cut the top of the pleating in a curved shape which correctly matched the waistline of my model. Whilst doing the pleating I used diagonal folds so that the skirt didn't turn out in a protruding zigzag type form as this would have made it difficult to gather the pleats at the waistline and therefore it wouldn't have looked as neatly finished. 
After fitting the skirt to the mannequin, I planned on cutting the skirt so that the length gradually got larger from one side to the next as illustrated in the initial sketch. However after creating the real thing I decided that I liked the aesthetic of the pleated skirt as one long even form and thought that by cutting it I might destroy the visual affect of the pleating. I also decided to do this during the process of making it as the short side of the skirt would have ended up being so short that the dress wouldn't have looked realistic.

After completing our creations, we then got our models to wear them and used background that we thought were interesting in and around Ravensbourne to take pictures of them.
One obvious background I thought of straight away was the circular windows as I felt that these curved shapes contrasted nicely with the abstract and angular image of the folds in my garment.


At the end of the day we did a fashion show with everyone wearing each others' paper garments. I found that this was a very fun and enjoyable way to end the fashion rotation and exhibit all our works.